
Homemade Rosemary Bread Recipe
Introduction
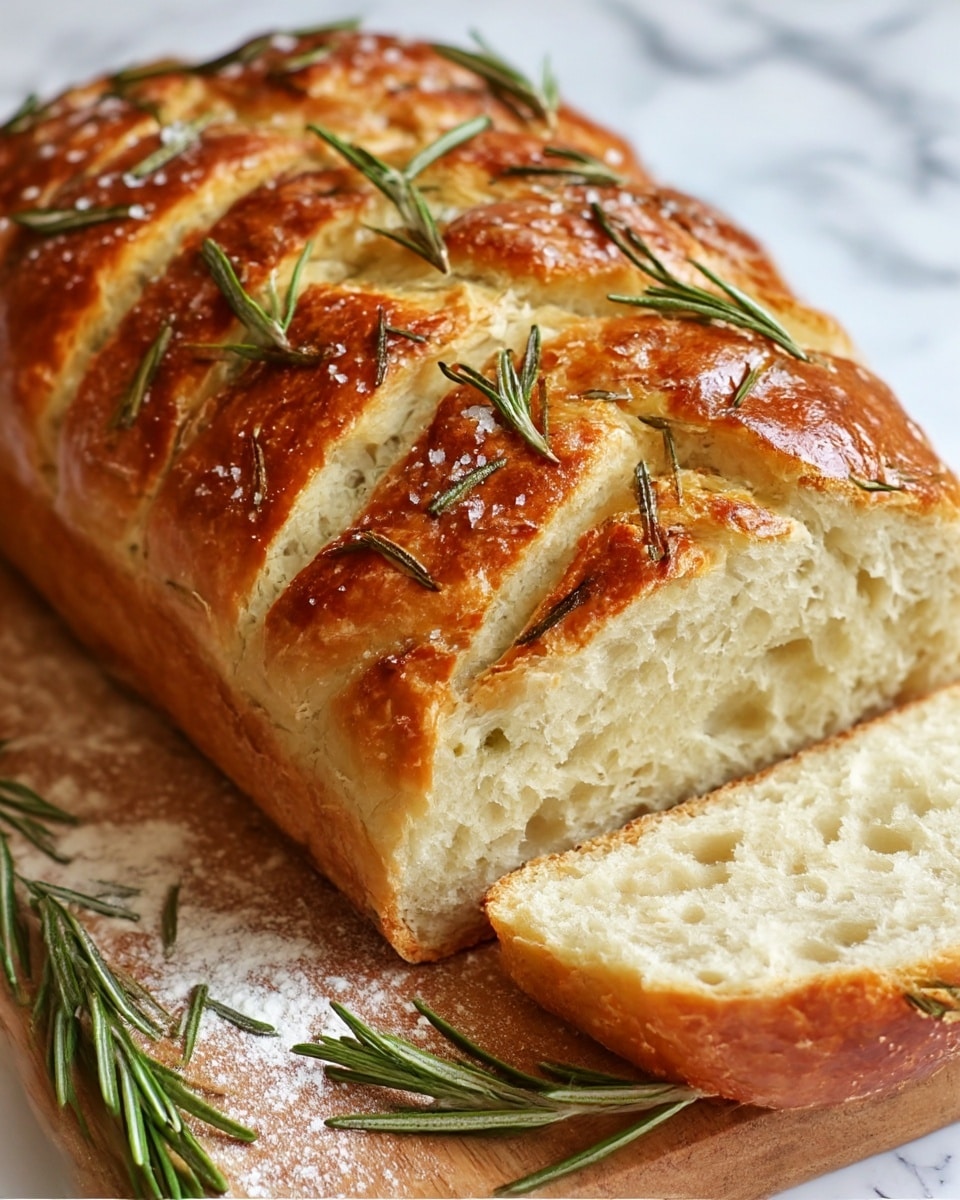
Homemade rosemary bread is a fragrant and flavorful loaf that’s perfect for any meal. This simple recipe combines fresh rosemary with a soft, chewy texture, making it a delightful treat straight from your oven.
Ingredients
- 4 cups all-purpose flour
- 1 packet active dry yeast
- 1 1/2 cups warm water
- 2 tablespoons fresh rosemary, chopped
- 1 teaspoon salt
- 1 tablespoon olive oil
Instructions
- Step 1: In a large mixing bowl, combine the warm water and yeast. Let it sit for about 5 minutes until it becomes frothy.
- Step 2: Add the flour, salt, chopped rosemary, and olive oil to the yeast mixture. Stir until a shaggy dough forms.
- Step 3: Knead the dough on a floured surface for about 10 minutes until it becomes smooth and elastic.
- Step 4: Place the dough in a greased bowl, cover it with a clean towel, and let it rise in a warm place for about 1 hour or until doubled in size.
- Step 5: Punch down the dough and shape it into a round loaf. Place the loaf on a baking sheet, cover it, and let it rise for another 30 minutes.
- Step 6: Preheat your oven to 400°F (200°C). Make a few slashes on the top of the loaf with a sharp knife and bake for 30-35 minutes or until golden brown.
- Step 7: Remove the bread from the oven and let it cool before slicing and serving.
Tips & Variations
- For a deeper rosemary flavor, lightly toast the rosemary before adding it to the dough.
- Substitute olive oil with melted butter for a richer taste.
- Add a pinch of garlic powder or grated Parmesan cheese for a savory twist.
- Use bread flour instead of all-purpose flour for a chewier texture.
Storage
Store the rosemary bread at room temperature wrapped in a clean cloth or paper bag to maintain its crust. It stays fresh for up to 2 days. For longer storage, slice and freeze the bread, then toast or warm slices directly from the freezer.
How to Serve

Serve this delicious recipe with your favorite sides.
FAQs
Can I use dried rosemary instead of fresh?
Yes, you can use dried rosemary but use about one-third of the amount, as dried herbs are more concentrated in flavor.
How do I know when the bread is fully baked?
The bread is done when it has a golden brown crust and sounds hollow when tapped on the bottom. Using a thermometer, the internal temperature should reach around 190°F (88°C).
PrintHomemade Rosemary Bread Recipe
This homemade rosemary bread is a fragrant, rustic loaf perfect for any occasion. Made with simple ingredients including fresh rosemary and olive oil, it offers a delightful aroma and a tender, flavorful crumb. Ideal for serving alongside soups, stews, or enjoying on its own with butter.
- Prep Time: 15 minutes
- Cook Time: 35 minutes
- Total Time: 2 hours 20 minutes
- Yield: 1 round loaf (about 8 servings) 1x
- Category: Bread
- Method: Baking
- Cuisine: Italian
Ingredients
Dry Ingredients
- 4 cups all-purpose flour
- 1 packet active dry yeast (about 2 1/4 teaspoons)
- 1 teaspoon salt
- 2 tablespoons fresh rosemary, chopped
Wet Ingredients
- 1 1/2 cups warm water
- 1 tablespoon olive oil
Instructions
- Activate Yeast: In a large mixing bowl, combine the warm water and active dry yeast. Let it sit for about 5 minutes until the mixture becomes frothy, indicating the yeast is active.
- Mix Dough: Add the flour, salt, chopped rosemary, and olive oil to the yeast mixture. Stir together until a shaggy dough forms.
- Knead Dough: Turn the dough out onto a floured surface and knead for about 10 minutes until it becomes smooth and elastic, developing gluten structure.
- First Rise: Place the kneaded dough into a greased bowl, cover it with a clean towel, and allow it to rise in a warm spot for about 1 hour or until it has doubled in size.
- Shape Loaf: Punch down the risen dough to release air. Shape it into a round loaf and place it on a baking sheet. Cover again and let it rise for another 30 minutes.
- Prepare to Bake: Preheat your oven to 400°F (200°C). Make several shallow slashes on the top of the loaf with a sharp knife to allow steam to escape during baking.
- Bake: Bake the loaf in the preheated oven for 30-35 minutes or until the crust is golden brown and the loaf sounds hollow when tapped on the bottom.
- Cool: Remove the bread from the oven and let it cool completely on a wire rack before slicing and serving to allow the crumb to set.
Notes
- Ensure the water is warm but not hot to properly activate the yeast without killing it (about 105°F to 110°F).
- Kneading is essential to develop gluten, which gives the bread its structure and chewiness.
- Let the bread cool completely before slicing to prevent a gummy texture.
- Fresh rosemary is preferred for the best flavor; dried rosemary can be substituted but use half the amount.
- For a crispier crust, place a pan of water in the oven while baking to create steam.
Keywords: rosemary bread, homemade bread, yeast bread, artisan bread, easy bread recipe, Italian bread