Mummy Oreo Balls Recipe
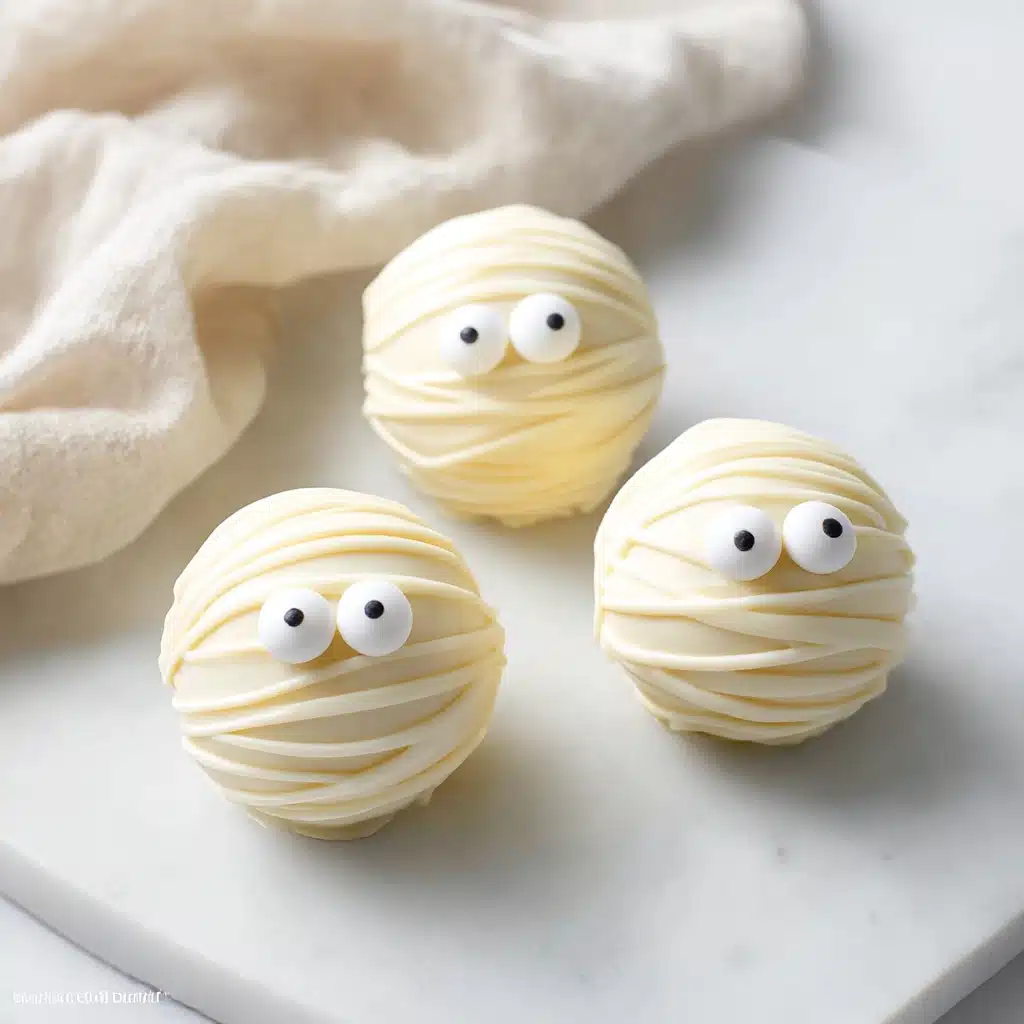
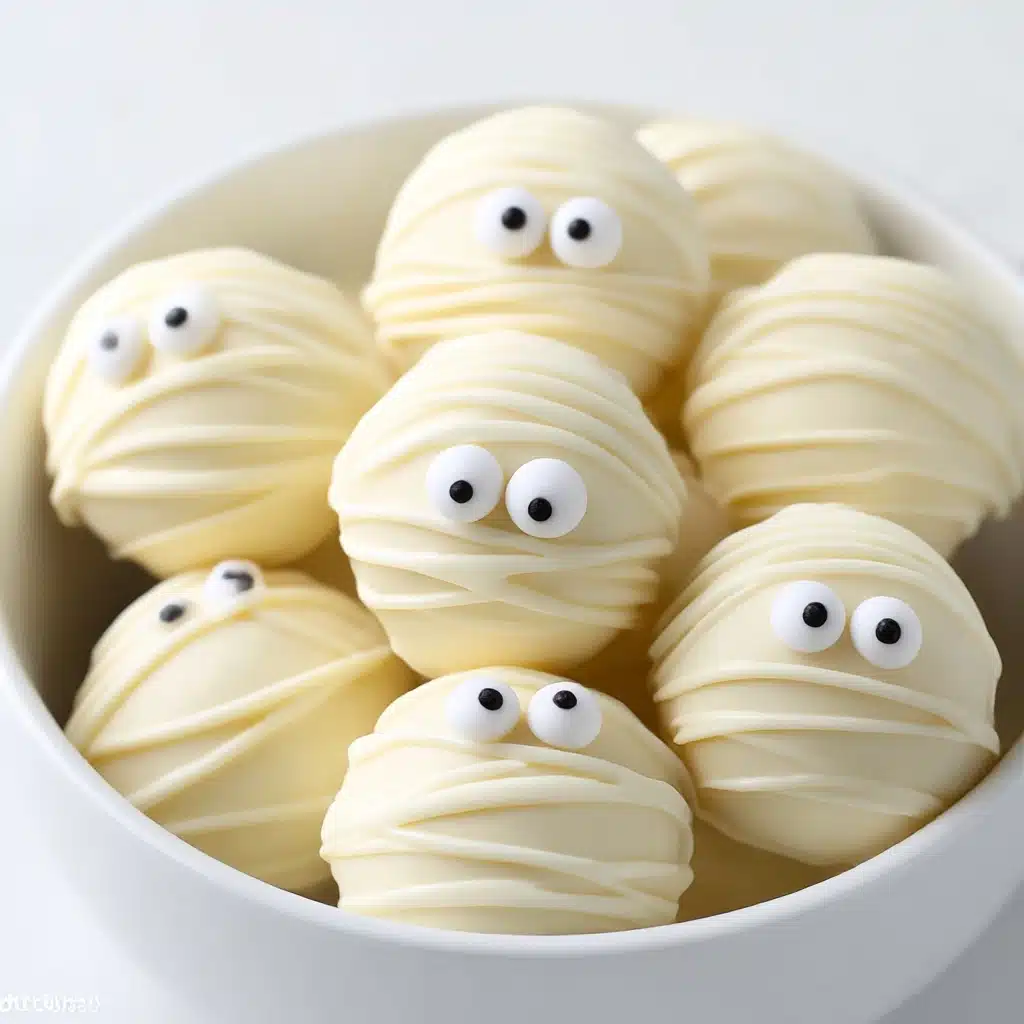
If you are looking for an irresistibly cute and delicious treat that’s perfect for Halloween or any fun occasion, these Mummy Oreo Balls are exactly what you need. These little ghostly delights marry the crunchy sweetness of golden Oreos with creamy, dreamy cream cheese and a luscious vanilla candy coating that forms irresistibly sweet “bandages.” The candy eyes add a playful touch that turns these Oreo balls into adorable undead morsels just waiting to be devoured. Each bite delivers a delightful contrast of textures and flavors that’s sure to make you smile.
Ingredients You’ll Need
Even though the ingredients for these Mummy Oreo Balls are few and simple, each one plays a crucial role in creating the perfect blend of flavor, texture, and appearance. From the golden Oreos providing that buttery crunch, to the cream cheese adding smooth richness, and the vanilla candy melts giving a sweet, creamy exterior that’s perfect for decorating, every ingredient counts!
- 20 Golden Oreos: Choose the golden variety for that light, buttery flavor which pairs beautifully with the vanilla coating.
- 4 ounces cream cheese, softened to room temperature: This makes the mixture creamy and helps bind the crumbs together into perfect balls.
- 10 ounces vanilla candy melts or dipping wafers: Melts easily to coat the Oreo balls in a smooth, sweet shell for that classic mummy look.
- 1 package candy eyes: The cute, spooky details that bring your mummy treats to life with minimal effort.
How to Make Mummy Oreo Balls
Step 1: Prepare the Oreo Mixture
Start by lining a large baking sheet with parchment paper—this will keep your treats from sticking and make cleanup a breeze. Next, pulse those golden Oreos in a food processor until they are reduced to fine crumbs. This crumbly base is essential for the perfect truffle texture.
Step 2: Combine with Cream Cheese
Place the Oreo crumbs into a large mixing bowl and add the softened cream cheese. Mix well until you get a smooth, uniform blend that holds together when you press it. This mixture is the deliciously creamy heart of your Mummy Oreo Balls.
Step 3: Shape the Balls and Chill
Using a cookie scoop or your hands, form the mixture into roughly 1-inch balls. Rolling them smooth between your palms helps create those classic round truffles. Arrange them on the parchment-lined baking sheet, then pop them in the freezer for about 30 minutes to firm up—this step ensures they won’t fall apart in the next stage.
Step 4: Melt the Vanilla Candy Coating
While your truffles chill, melt your vanilla candy melts or dipping wafers according to package instructions. A smooth, runny coating is crucial for dipping and decorating your Mummy Oreo Balls perfectly.
Step 5: Dip and Decorate
Working with one ball at a time, use a fork to dip each Oreo ball into the melted vanilla coating. Turn it gently to coat evenly, and tap off any excess chocolate. Remember, the ball should rest on the fork tines rather than be pierced through for a flawless finish. Return each coated ball to the parchment-lined sheet.
Step 6: Add the Mummy Details
Pour the remaining melted chocolate into a small plastic bag, cut a tiny hole in the corner, and drizzle thin “bandage” stripes over the coated balls. Before the chocolate sets completely, press two candy eyes onto each ball—adding a small dab of melted chocolate behind the eyes helps them stick securely. Pop everything into the fridge for 15 to 20 minutes to let the chocolate harden.
How to Serve Mummy Oreo Balls
Garnishes
For an extra festive look, consider sprinkling tiny edible glitter or colorful Halloween sprinkles around your Mummy Oreo Balls on the serving platter. A light dusting of crushed golden Oreos nearby can echo the flavor inside while adding a decorative touch.
Side Dishes
These treats pair wonderfully with a chilled glass of milk, hot chocolate, or even a fruity punch for a balanced flavor contrast. For a party setting, serve alongside other Halloween-inspired treats like ghost-shaped sugar cookies or caramel apples to create a spooky dessert spread.
Creative Ways to Present
For a playful presentation, place your Mummy Oreo Balls in cupcake liners decorated with cobweb designs, or arrange them atop a platter lined with crumpled black tissue paper for a dramatic effect. You might also display them on small wooden skewers placed upright in a foam block for a mummy “army” that guests can grab easily.
Make Ahead and Storage
Storing Leftovers
If you happen to have leftovers (which might not last long!), store your Mummy Oreo Balls in an airtight container in the refrigerator. They will stay fresh and delicious for up to one week, so you can enjoy little bites of fun for days.
Freezing
Want to prepare these ahead of time? Freeze your Oreo balls on a parchment-lined tray before coating, then transfer to a freezer-safe bag. You can also freeze the finished Mummy Oreo Balls in a single layer to prevent sticking. When frozen properly, they maintain their flavor and texture for about a month.
Reheating
Since these are no-bake treats best enjoyed cold, reheating is not recommended. Instead, let frozen or chilled Mummy Oreo Balls come to room temperature for about 10 minutes before serving to bring out their creamy, luscious texture without melting the decorations.
FAQs
Can I use regular Oreos instead of golden ones?
Absolutely! Regular Oreos will give you a chocolatey twist on this recipe, adding a deeper flavor contrast to the vanilla coating. Just be aware the overall look will be darker and less mummy-like in color.
What if I don’t have a food processor to crush the Oreos?
No problem! You can place the Oreos in a sealed plastic bag and crush them with a rolling pin or mallet until finely ground. Just make sure to crush them evenly for the best dough texture.
Can I substitute cream cheese with something else?
Cream cheese offers the ideal creamy texture and mild tang that binds the crumbs and balances sweetness, but if you must, you could try mascarpone or a dairy-free cream cheese alternative for different dietary preferences.
How do I make sure the candy eyes stick properly?
The trick is to attach them while the drizzle chocolate is still wet. If it starts to harden, put a tiny dab of melted candy melts or chocolate on the back of each eye before pressing it onto the Oreo ball. That way, they stay put until fully set.
Are Mummy Oreo Balls difficult to make?
Not at all! This recipe is wonderfully straightforward, especially if you follow the chilling steps and use the right tools for melting and dipping. They’re perfect for bakers of all levels who want quick, festive treats that look impressive.
Final Thoughts
If you want a spooky, sweet snack that’s as fun to make as it is to eat, I wholeheartedly recommend trying these Mummy Oreo Balls. They’re playful, delicious, and guaranteed to bring smiles around any table. Once you give them a try, I bet these little mummies will become a favorite go-to treat for Halloween and beyond!
PrintMummy Oreo Balls Recipe
These Mummy Oreo Balls are a fun and spooky no-bake treat perfect for Halloween. Made with crushed Golden Oreos and cream cheese, dipped in vanilla candy melts, and decorated with candy eyes to resemble cute little mummy faces, they’re easy to make and delightfully delicious. The creamy and crunchy texture combined with sweet vanilla coating makes these treats a festive favorite for both kids and adults.
- Prep Time: 15 minutes
- Cook Time: 0 minutes
- Total Time: 50 minutes
- Yield: About 20 Oreo balls 1x
- Category: Dessert, Snack
- Method: No-bake, Freezing, Dipping
- Cuisine: American
- Diet: Vegetarian
Ingredients
Base Ingredients
- 20 Golden Oreos
- 4 ounces cream cheese, softened to room temperature
Coating & Decoration
- 10 ounces vanilla candy melts or dipping wafers
- 1 package candy eyes
Instructions
- Prepare Baking Sheet: Line a large baking sheet with parchment paper and set it aside to use later for setting the coated Oreo balls.
- Crush Oreos: Pulse the Golden Oreos in a food processor until you get very fine crumbs, ensuring an even texture for mixing.
- Mix Base: Pour the Oreo crumbs and softened cream cheese into a large mixing bowl. Stir thoroughly until the mixture is well combined and smooth, forming a thick dough.
- Form Balls: Using a cookie scoop, portion the mixture into roughly 1-inch balls. Roll them between the palms of your hands for a smooth, uniform shape. Place these balls onto the parchment-lined baking sheet, then transfer the sheet to the freezer for 30 minutes to set the balls firmly.
- Melt Chocolate: Melt the vanilla candy melts according to the package instructions, usually using a microwave in short intervals or a double boiler, stirring frequently to achieve a smooth, fluid consistency.
- Dip Oreo Balls: Pour the melted chocolate into a small bowl. Working one ball at a time, use a fork to dip each Oreo ball into the melted chocolate, carefully turning to coat the entire ball. Gently tap the fork against the side of the bowl to remove excess chocolate. Ensure the truffle sits on top of the fork without puncturing it.
- Set Coated Balls: Transfer each dipped ball back onto the prepared baking sheet to set the chocolate coating.
- Decorate Mummies: Pour remaining chocolate into a resealable plastic bag and cut a small hole at one corner. Drizzle the chocolate over the coated balls in a mummy-wrap pattern. Quickly stick two candy eyes onto each ball. If the chocolate hardens too fast, add a small dot of melted chocolate to the back of the eyes for better adhesion.
- Chill to Set: Place the decorated Oreo balls in the refrigerator for 15-20 minutes to allow the chocolate to fully harden and set.
- Serve and Enjoy: Remove from fridge and serve your adorable mummy Oreo balls to friends and family for a fun Halloween treat!
Notes
- Use Golden Oreos for a light-colored mummy look, but regular Oreos can be used for a darker, more gothic appearance.
- Make sure the cream cheese is softened to room temperature for easier mixing and smoother texture.
- When melting candy melts, be careful to avoid overheating as it can seize and become unusable.
- If candy eyes are not available, small edible white and black icing dots can be used as alternatives.
- Store the finished mummy Oreo balls in an airtight container in the refrigerator for up to 5 days to maintain freshness.
- These treats can also be frozen for up to 1 month; thaw in the refrigerator before serving.
Nutrition
- Serving Size: 1 Oreo ball (approx. 25g)
- Calories: 110
- Sugar: 12g
- Sodium: 85mg
- Fat: 6g
- Saturated Fat: 4g
- Unsaturated Fat: 2g
- Trans Fat: 0g
- Carbohydrates: 14g
- Fiber: 0.5g
- Protein: 1g
- Cholesterol: 10mg
Keywords: Oreo balls, Halloween treats, mummy desserts, no-bake snacks, candy melts, Halloween Oreo balls, easy dessert